Introduction:
Kubernetes has become the industry standard for container orchestration, providing scalability, flexibility, and reliability for deploying applications. By following this step-by-step tutorial, you will learn how to set up a Linode Kubernetes cluster, deploy a sample application, and manage it using Linode’s intuitive interface.
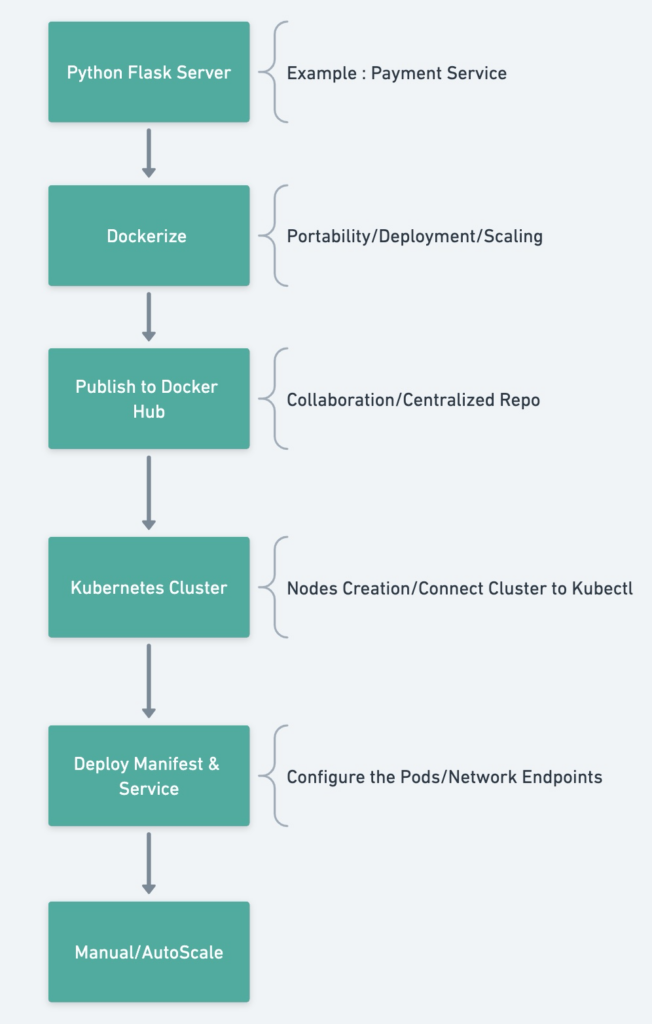
Service: Let’s say you develop a payment service that runs on a stand-alone server perfectly fine. Example: Let’s assume that you implemented using the Python Flask framework.
from flask import Flask

app = Flask(__name__)

@app.route('/')
def hello():
    return "Hello, world!"

if __name__ == '__main__':
app.run(host='0.0.0.0', port=5000)Dockerize: If you want your service to be accessed widely and if you anticipate high traffic, then you may have to deploy/run the code on many servers to handle the traffic. You may also have to consider using an ALB before your servers. However, since the servers might not be uniform in terms of configurations and to avoid the incompatibilities with dependencies, one should dockerize the app which essentially means to package the slice of the OS and the libraries needed to run the application.
# Use the official Python base image
FROM python:3.9-slim

# Set the working directory
WORKDIR /app

# Copy the requirements file and install dependencies
COPY requirements.txt .
RUN pip install --no-cache-dir -r requirements.txt

# Copy the application code into the container
COPY app.py .

# Set the command to run the application
CMD ["python", "app.py"]
brew install docker
docker build -t mywebapp .Docker Hub: Docker Hub is a cloud-based registry service provided by Docker, the company behind the popular containerization platform. It serves as a central repository for storing, managing, and sharing Docker images. Docker Hub provides a searchable catalog of public Docker images. You need to have an account in the docker hub which would let you push the docker images. Notice that my user-id is achuthadivine , hence i have tagged the docker image with achuthadivine/mywebapp
[~/Achuth/code_base/Kubernetes]$:docker login
Login with your Docker ID to push and pull images from Docker Hub. If you don't have a Docker ID, head over to https://hub.docker.com to create one.
Username: achuthadivine
Password:
Login Succeeded

[~/Achuth/code_base/Kubernetes]$:docker tag mywebapp achuthadivine/mywebapp
[~/Achuth/code_base/Kubernetes]$:docker push achuthadivine/mywebapp
Using default tag: latest
The push refers to repository [docker.io/achuthadivine/mywebapp]
f13a207a86f3: Pushed
9be280ec752d: Pushed
24839d45ca45: Pushed
latest: digest: sha256:7ff123bea63ad866eb6b4bacc0d540d3b4a6dde520f63e5bd1dbda94e5ea2dd2 size: 2202
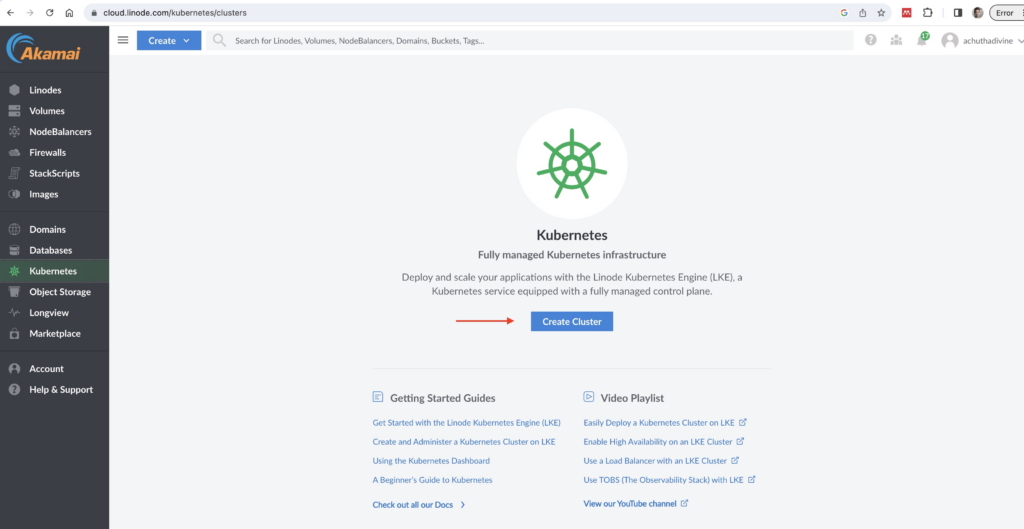
Linode Kubernetes Cluster: Before getting started, create a Linode account by visiting the Linode website (www.linode.com) and signing up for a new account. This process is straightforward and requires only a few minutes to complete. Once you have your Linode account, navigate to the Linode Kubernetes Engine (LKE) and create a new Kubernetes cluster.
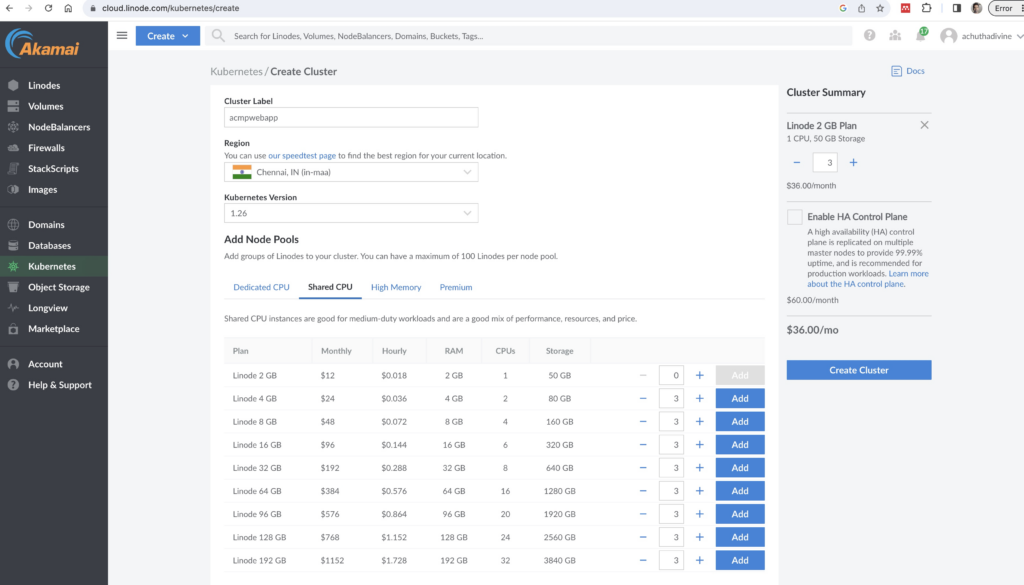
Once the cluster is created, download the Kubeconfig to your machine. Kubeconfig is a configuration file used by the Kubernetes command-line tool, kubectl, to authenticate and access Kubernetes clusters
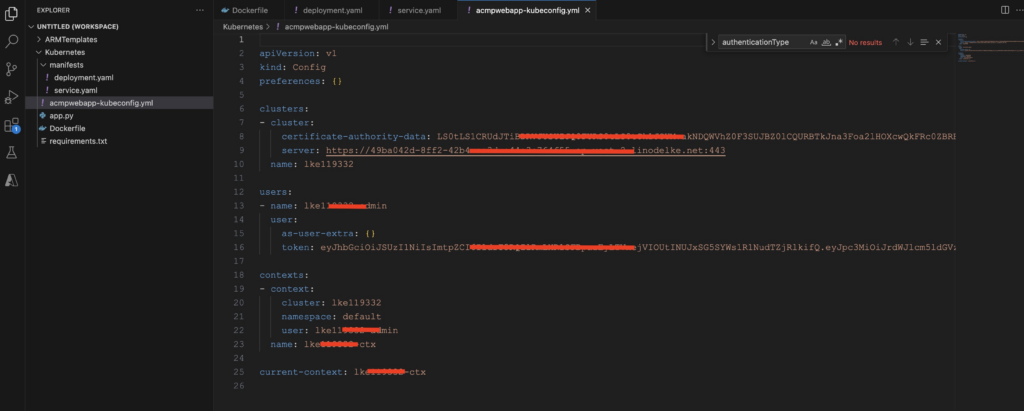
Connect the kubectl[Kubernetes command line tool] to the Linode Kubernetes Cluster by setting the KUBECONFIG environment variable.
brew install kubectl
export KUBECONFIG=acmpwebapp-kubeconfig.yml
Deploy Manifest and Service: The Deployment manifest and Service manifest work together. The Deployment ensures that the desired number of instances (Pods) of your application is running, while the Service provides a stable and accessible endpoint for communication with those instances. The Service directs traffic to the running Pods based on the labels specified in the Deployment’s selector. In the example you can see that I want to start of running the app in 3 different pods. image details would speicify what docker image should be run when new pods are created to scale the app.
deployment.yaml
apiVersion: apps/v1
kind: Deployment
metadata:
  name: mywebapp-deployment
spec:
  replicas: 3
  selector:
    matchLabels:
      app: mywebapp
  template:
    metadata:
      labels:
        app: mywebapp
    spec:
      containers:
      - name: mywebapp
        image: achuthadivine/mywebapp:latest
        ports:
        - containerPort: 5000
service.yaml
apiVersion: v1
kind: Service
metadata:
  name: mywebapp-service
spec:
  selector:
    app: mywebapp
  ports:
    - protocol: TCP
      port: 80
      targetPort: 5000
  type: LoadBalancer
[~/Achuth/code_base/Kubernetes/manifests]$:kubectl apply -f deployment.yaml
deployment.apps/mywebapp-deployment created
[~/Achuth/code_base/Kubernetes/manifests]$:kubectl apply -f service.yaml
service/mywebapp-service created
[~/Achuth/code_base/Kubernetes/manifests]$:
Ola !!! Your service is up and running in three different pods and i can access the service from my browser.


Manual /Autoscaling :
Increase the Pods Manually to 10 as you can see my replicas is 10.
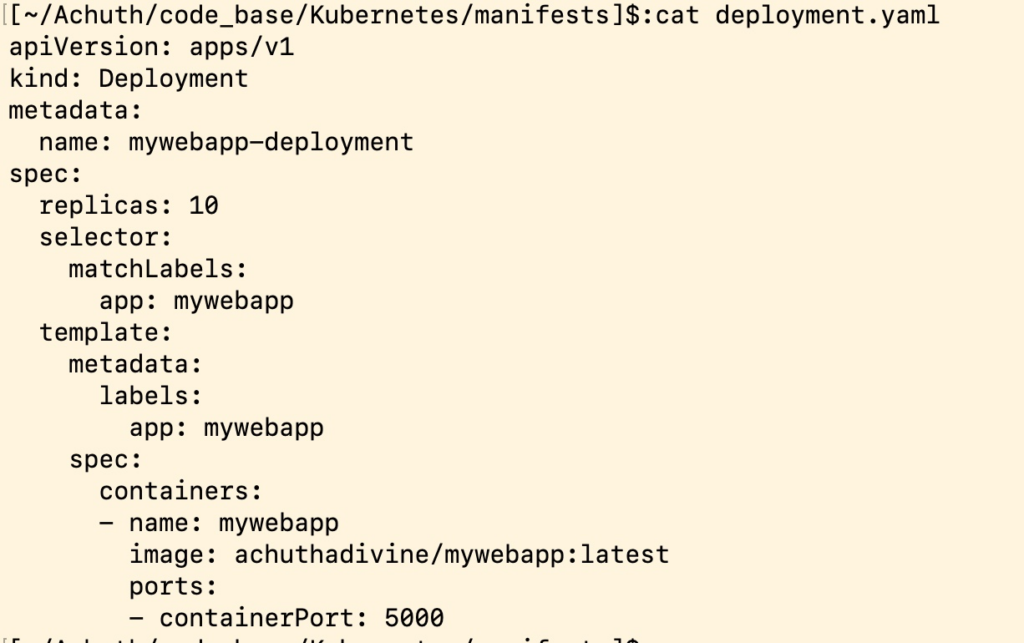
[~/Achuth/code_base/Kubernetes/manifests]$:kubectl apply -f deployment.yaml
deployment.apps/mywebapp-deployment configured
In Kubernetes, you can control autoscaling using the Horizontal Pod Autoscaler (HPA) feature. The HPA automatically adjusts the number of replicas (pods) based on the observed CPU utilization or custom metrics of your application. Here’s an overview of how to control autoscaling in Kubernetes:
HPA.yaml
apiVersion: autoscaling/v2beta2
kind: HorizontalPodAutoscaler
metadata:
  name: my-hpa
spec:
  scaleTargetRef:
    apiVersion: apps/v1
    kind: Deployment
    name: my-deployment
  minReplicas: 2
  maxReplicas: 10
  metrics:
  - type: Resource
    resource:
      name: cpu
      target:
        type: Utilization
        averageUtilization: 70
Let me know in case of any questions/doubts. Happy to answer/assist w.r.t above topic.